ConvEx |
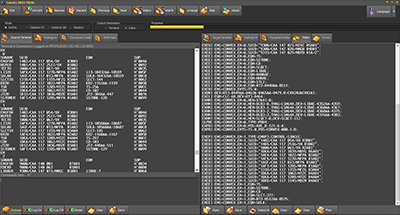
Conversion of Exchange DataConvEx is designed to convert and deblock RSS/SSS/RSM hardware data between two Ethernet connected Ericsson AXE plants. Before you can connect to source and target AXE's, you have to set the port and IP address of the desired host, and connect your client socket to this host. If available, ConvEx is delivered with a complete database containing all host addresses in your Telnet. The AXE field performs an incremental search in the database as you enter characters, and the host field is updated every time a matching host is found. Just press the Connect button to open an IP session, and hopefully the AXE will answer with user code / password request and optionally NVT request. Use the Hot labels to add or delete a host item. Click twice in the "New AXE" and "New IP" nodes to turn them into editors and type a name and an IP address. The changes can be saved manually pressing the Save button or automatically on exit. On program start, the EMG Tab is empty. Click on the EXEGP:EMG=ALL; label to transmit the command to Terminal A. When the EMG data printout has finished, the EMG Tab now holds a list of all EMG's defined in your source AXE. Expand the node for the first EMG to make child nodes with print command for the parent EMG visible. Select the EXEPP:EMG=emg,EM=ALL; node and click the Send Node to A label. Watch the printout to gather information about the lowest and highest EM-number defined in the actual EMG. Now adjust the From and To spin buttons found on the Conversion Data tab sheet to the values matching the printout. Enter optional new RP, CLC numbers or factors etc. and new EMG name and route names to Conversion Data. EQM of type: LI3 - LIRA2 - LIPRA - LIBAE - LIPRAE - JT - RT1 - RT2 - RT3 - KR2 -SLCT - SEPRM2 - SEEOS - SLQCT - EXAL0 - SULTD - TW - ETGAM - FHL - ETV5 and ETPRA can be added or subtracted individual factors. On the Equipment Data tab sheet, you can enter optional change of SUID's prior to execution or load a predefined table. Select source - and target AXE from the databases and log on to both AXE's, and press the Convert button to start conversion. The entire EMG or the specified EMRP's are now copied from source AXE to target AXE in a few minutes with optional number changes included. Handle rejected commands from the Errors tabsheet when finished. Use the remaining print commands to watch the result in Terminal B. If you are satisfied with the new EMG data, click on the Mark Node and proceed to the next EMG. You can also delete the nodes according to your progress. After successful data conversion, you can deblock the EMG by changing mode to Deblock EX or Deblock SB, depending on your target terminal port. The only difference is, that you need to use Test System commands to deblock EMTS's in a separated central processor (CP). By selecting an editor as your Output Destination, you can generate all the commands and save them for later transmission. The ConvEx Editor tab sheet provides a Save option, if you want to save the Data Transcript (DT) to a file for use in WinFiol, Sight or Figaro. You cal also use the Select All and Copy buttons to move the DT to the Windows clipboard, from where you can paste it to your favorite terminal emulator. Rejected commands are summarized on the Errors tab sheet with error codes appended as a comment, ready for retransmission after e.g. SAE increase. |
